How to Organise an Art Lesson
Check out my YouTube Channel for great Art History tutorials designed for schools
Background
Are you a primary/elementary school teacher who has to teach art lessons, but you are not an art specialist? Have you just been appointed art co-ordinator or art lead? Have you just started teaching art and are a bit daunted by organisation and delivery of an art lesson? If any of the answers to these questions is yes, you need to read the rest of this post.
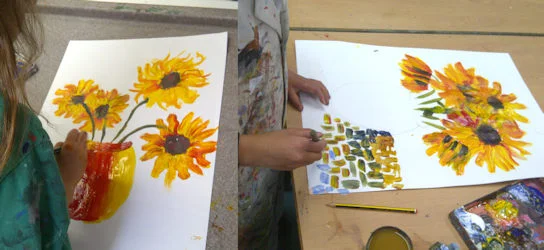
I taught art in secondary schools for years and after leaving teaching ran art workshops in primary schools as Van Gogh, Picasso, Monet et al. I have worked in more than 500 schools and seen some great teaching and some not so great teaching – so here goes.
What is an Art Lesson?
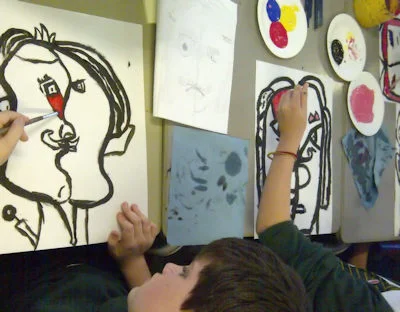
An art lesson is NOT about giving children an idea, or starting point and letting them get on with it, whilst the teacher catches up with marking or the like. If the teacher is not engaged in the lesson, why should the children be? An art lesson is about engagement, teaching art skills, creating opportunities to experiment. It is about encouraging and inspiring children and combating negativity. Children should learn about artists and the way they develop ideas and should experience these processes themselves. Children need to celebrate the fact that no one in the world, draws, paints or creates like they do. Children need to realise there is no such thing as perfection. Crying over a drawing because they have made a ‘mistake’ is simply crying over a sheet of paper with lines on it. It is not the end of the world. Mistakes are wonderful, because we can learn from them. See the videos opposite for ways to combat these problems in art lessons.
How to Teach an Art Lesson
So, you have an art lesson to teach. I am not going to try to cover lesson plans here, but the practical elements of organising the lesson. I’ll use a painting lesson as an example.
Planning, Organisation and Involvement are the keys to a great lesson.
Planning an Art Lesson
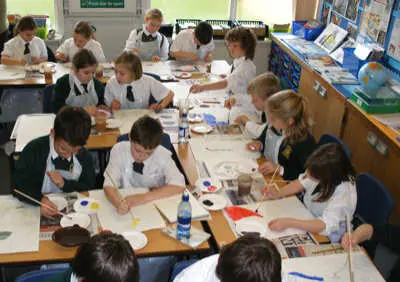
Most primary schools don’t have a separate, dedicated art room. Most art lessons take place in a normal classroom, which probably has a small sink. So, the first thing that panics the teacher is the mess and chaos an art lesson can cause. Plus the inordinate amount of time needed to clear up at the end of the art lesson. It does not have to be like that, if you do the following.
- If you have the opportunity, start the art lesson at the beginning of the morning or the start of the afternoon. This allows time for the organisation of the room before the lesson starts.
- Organise the materials you need for the lesson from the stock cupboard, if they are not held in the room, before the lesson starts.
- Appoint monitors/helpers and give them responsibility for certain tasks.
- Make sure you have planned meaningful tasks for those who finish their work early. And more materials for those likely to require them.
- Plan for disasters. Water pots knocked over, paint spilt on floors. Paint spilt on other people’s work or other children. What are you going to do, what do you need?
- You’ll need bin bags for rubbish.
- Where are you going to store a class set of wet paintings?
Organising Art Teaching in School
The whole school should follow the same plan and organisational strategy for art lessons. If they do, the quality of work produced by the children is much better. A key part of the art leader’s job is to ensure this happens. Pester, cajole or demand support for this from the hierarchy of the school.
- Buy large plastic sheets to cover the desks – better than newspaper – they last for years.
- Place one palette between two children and make sure it has the colours required. I suggest using paper plates as palettes, it saves washing up at the end, and can binned at the end of the lesson. Give children the primary colours plus white, (black very occasionally). Encourage colour mixing. Give each child a paper plate as their own mixing palette. Offer a prize, house points, gold stars or whatever for the children who keep their paint palette (colours) as clean as possible (not their mixing palette), i.e. they haven’t mixed everything together and produced brown. If you insist on this it is surprising how soon children will adapt. Paintings will look fresher and less brown!
- Don’t use plastic cups or yoghurt pots as water pots as they fall over easily. Make the school buy proper water pots with wide bottoms that are difficult to knock over. A water pot between two children is ideal.
- Brushes, PLEASE buy reasonable quality brushes for older children. Squirrel hair brushes or brushes that when dipped in water and held horizontally simply just flop, are not good to paint with. DON’T, PLEASE DON’T use brushes to mix or apply glue. Provide each child with a small and a large brush when painting – bristle brushes if using Redimix or poster type paint. Encourage children to use the larger brush to paint the big areas and the smaller brush for details. It’s amazing how children will often do the opposite. If you insist on high standards children will eventually follow.
- Give each child a paper towel or a few sheets of toilet paper to wipe their brushes on.
- Children deserve decent paper to paint on, copier paper is not good enough. Cartridge paper if possible. Other types of paper can be used depending on the project. Remember the paper needs to be capable of taking a lot of water.
- Make sure the above is on the tables before the art lesson starts. Organising the above with 30 children at the start of their lesson is chaotic and wastes valuable art time.
- Establishing routines and standards is the key to successful art teaching.
Involvement
Primary schools in England will have teaching assistants who can help with the organisation of the above, but there may be schools elsewhere in the world where this is not the case. When I started teaching I was on my own so I, as the art teacher, had to do everything – planning, organisation is essential. But whatever your situation make sure you make use of that great enthusiastic resource – children. There is no reason why children as young as 5 cannot be given responsibility – under supervision until old enough to work independently – to become monitors (you might use a different term) for certain tasks. For example:
Appoint Monitors
If you can organise the art lesson to start after a break, you have time during the break to have monitors prepare the room. You will need to supervise this, but after a while the children will be responsible enough to do it themselves, depending on age, of course. A suggested plan might be to appoint the following:
- Four children are appointed as plastic sheet monitors – they cover all the tables
- Put two children in charge of filling water pots and placing them on the tables
- Two children sort out brushes as outlined above.
- Two children place the required number of paper plates on each desk
- Appoint four children to take one colour each and are responsible for putting that colour on the paper plate.
- Two children put out the paper.
You may wish to amalgamate some of the above roles
Before children leave at the end of the lesson they clean their desks. Possible system – one person responsible for organising and delegating tasks for the cleaning for each table or follow the plan below. Lots of training and practice will be required.
Responsibilities in the Art Lesson
You would have to decide if your children are old enough to take on these responsibilities. However, this can be chaos if all the children try to do this at the same time. You’ll have to train them to follow the above plan in sequence. It will take time and effort on your part, but when you’ve got them organised you’ll be surprised how quickly an art lesson can be set up.
The end of the lesson the same principles apply. You could have the same monitors or appoint different ones. I would suggest ending the lesson as follows:
- Every child remains seated unless they have a job to do.
- 2 children walk around the room with plastic bin bags and children deposit their paint and mixing palettes in them.
- Children from one table at a time take their finished paintings to the drying rack or wherever and return to their seat.
- One child from each table collects the brushes from the table and puts them in the sink and returns
- Two children from the table collect water pots and put them by the sink.
- Children fold up their plastic sheet ready for collection by the plastic sheet monitors.
- Depending on sink size, 2 children wash brushes and pots
You will have to decide whether some of these tasks can take place simultaneously.
Ending an Art Lesson
Once all the clearing up has been done make time, if only a couple of minutes, to thank the monitors. Insist on on their attention (silence) before commenting on how well they have performed, assuming they have. Talk briefly about what has been achieved in the lesson and how you feel about it, give praise where it is warranted. Outline what is happening in the next lesson and what you expect them to achieve. If you persist with the above and think about the organisational and structural parts of the lesson as much as the creative elements, you should produce great art lessons.
Final Points
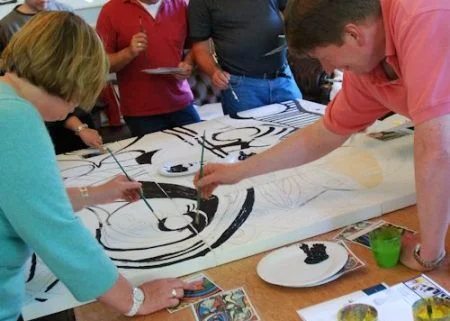
It is important that children see that you, as the art teacher, see the art lesson as important as any other lesson you might teach. Why don’t you work alongside the children and produce a painting or drawing during the lesson? Don’t feel inhibited, remember you are making every child paint, even the reluctant ones, so why shouldn’t you paint and draw too.
Justifying the Importance of Art
There are some bright children especially, who cannot see the point of art, they see maths and science as being far more important. If you have children like this you might mention Jonathan Ive who was born in Chingford, near London and was at one time chief designer for Apple. He is credited with coming up with the idea and designs for the first iPad and the iMac. Before his arrival at Apple in 1990, they were a relatively small company in the tech world, but Jonathan Ive’s designs changed them into the world’s largest and wealthiest company. A good example of how art inspires science.
Finally, on a more frivolous note, you can imagine the amount of maths, science and the advanced technology that is currently being built into driverless cars, it is quite mind boggling. You can imagine as these cars are let loose on our streets, their computer brains will be some of the most sophisticated computers that man has produced. Yet, recently an artist completely confused a driverless car with a line of salt. He simply drew, in salt, a very large circle on a test track and outside the circle drew another dotted circle to enclose the first. The driverless car drove into the circle because it knows it can cross a dotted line, but it couldn’t get out of the circle because it knows it should not cross a continuous white line. Isn’t art wonderful.
Check out my YouTube Channel
for great How to Draw tutorials designed for children
Checkout these Articles for More Information


Thanks for also also talking about the typical timeslots to expect from art classes. I’d like to take one soon because I’m interested in doing more productive things during my free time. I think that learning things that I didn’t have a chance to tackle in college would be nice.